Trekking and Photography: The Laugavegur Trail
- George Wheelhouse

- Feb 4, 2019
- 37 min read
Updated: Nov 20, 2022
I previously shared a post containing the best of my photos from my Laugavegur trail trek. This follow-up post is aimed at anyone who's considering this trek themselves, or something similar - Especially if you intend to combine hiking with photography. It's a fairly comprehensive discussion of logistics, locations, problems, and our choices. If you haven't read the previous post, I'd recommend reading that one first. If you follow this blog purely for the photos, then this is probably not the post for you. There are photos in this post, but they're a combination of 'out-takes' and illustrative imagery, rather than 'proper' photos. Otherwise, I hope you find it useful or interesting. It's very much the story of a man out of this depth, but enjoying the challenge.
Warning: This is a long post. In fact I'm reading the Icelandic Sagas at the moment, and this blog post is not far off one itself. Albeit with slightly less violent marauding.
As I mentioned previously, I undertook this hike with fellow landscape photographer Elliot Hook, who's also shared some great posts about our trip. There'll obviously be some cross-over information in both our blogs, but I'm sure Elliot's will contain all the crucial logistical information and practical advice which I've forgotten, and more fantastic photos. So the two perspectives should complement each other for anyone interested in hiking the Laugavegur trail. Between us, Elliot and I had very little experience of this sort of thing. We just wanted to try something a bit 'out-there', and push our landscape photography in a slightly more adventurous direction. Fortunately in that respect, we were joined on this occasion by my dad and my brother, who are less into photography, but have a huge enthusiasm for hiking and climbing. They've so far escaped death everywhere from the Alps & the Dolomites, to Death Valley, Yosemite, and Everest. They helped us a lot, adding some much needed experience to the team.
Of course it's possible to hike the trail as part of a tour group. And there are various options out there for that; both photography tours, and hiking tours. But Elliot and I wanted to do our own thing, plan our own custom schedule, and do things the way we wanted. For some people, that might not appeal, in which case there is every reason to do this with a tour group, who'd take care the logistics and planning. You also benefit from the experience of the tour leaders, which is of great value. Some tours even carry your kit from hut-to-hut, and cook your meals for you! But my philosophy is that I'd generally rather bumble through on my own, struggle, and hopefully learn in the processes, than take a tour which might hamper my freedom or creativity, or dampen my feeling of achievement. I think it would also diminish my feeling of ownership of my photos if I'd been lead to someone else's viewpoints. But, to each his own on that one.
The Laugavegur Hiking Route
The Laugavegur trail is a multi-day trekking trail in the south-west highlands of Iceland. The route runs between Landmannalaugar and Thórsmörk (Þórsmörk). As a cheeky bonus, you can also add an extension to Skógar, via the Fimmvörðuháls path. As we were planning our trip, I found it hard to visualise the route. Many of the maps I found online were unclear and too small/large, so I've drawn my own for this blog.

The classic way of hiking this trek is over 4 days:
Day 1: Landmannalaugar -> Hrafntinnusker
Day 2: Hrafntinnusker -> Álftavatn (or Hvanngil)
Day 3: Álftavatn (or Hvanngil) -> Emstrur
Day 4: Emstrur -> Thórsmörk
However, these distances are pretty short for experienced hikers, and it can comfortably be completed in 2 days for those in good shape:
Day 1: Landmannalaugar -> Álftavatn (or Hvanngil)
Day 3: Álftavatn (or Hvanngil) -> Thórsmörk
We decided on a custom itinerary as follows:
Day 1: Landmannalaugar -> Álftavatn
Day 2: Álftavatn -> Hvanngil
Day 3: Hvanngil -> Emstrur
Day 4: Emstrur -> Thórsmörk
The idea there was to maximise time on the trail as much as possible, by staying at each hut - except Hrafntinnusker, which is prone to bad weather (being the high-point of the trail), and is generally regarded as an unpleasant accommodation. By getting half the distance done on the first day, meant that for the remainder of the trip, we'd only have short distances required. And that meant that we could stop for photos along the way as much as we liked. We would also have plenty of time for photo shoots before and after the day's hike. Either side of the trek, we had 2 nights in Landmannalaugar, and 1 night in Thórsmörk at the end.
My dad and my brother decided to tack on the Fimmvörðuháls extension at the end, whereas Elliot and I prioritised photography opportunities by spending the last day in Thorsmork. By all accounts the Fimmvörðuháls was totally spectacular, and I'm told we should have done it too. But in hindsight I don't regret our decision at all. In fact if we'd have had another day there I'd have spent that in Thorsmork too, such is the scope for photography in that area. So for others this decision is probably going to depend on whether your priority is photography or hiking/adventure.
Planning
Boy, did we plan for this trip. The huts sell out well in advance, so we had to book them as early as possible. We booked in late December, and managed to secure only three of the six hut nights we wanted; going onto a cancellation waiting list for the other three nights. This meant that up until a couple of weeks before we went, we didn't know if we would be camping some nights or not. That's not ideal, so I'd suggest avoiding this situation by either booking earlier than 7 months in advance, or being flexible in your dates, to work around availability. In the end we did get into huts for each night, so we knew we'd be warm and dry come the evening. More importantly it lightened our load; not needing to carry tents, cooking equipment, etc.
Speaking of weight, that was a massive factor in our planning (and concern on my mind). The advice is to carry no more than one third of your body weight for this kind of trek. So for me, that maximum weight allowance was 20 kilograms. I was never going to go genuinely ultralight (this is a whole world within the world of hiking), but it seemed like a fair split would be 5kg for photography kit, 5kg for food, and 10kg for everything else. That was always going to be very very tough to achieve, but it was my goal, and I knew that the lighter my rucksack, the easier the hiking would be, and the more I'd enjoy it. And the more I'd be fit to get out with my camera at the end of the day - which was the main point of going in the first place. So like any healthy obsessive, I drew up a spreadsheet of required kit, including the weight of that kit. The initial weight came in around 25kg. I had a few months to get that down to, or under 20kg. Not needing a tent was a big (albeit last minute) help as that saved me 2kg. Every single item of kit I carried was under scrutiny, and I managed to strip the list down to the bare necessities to make a final weigh-in of 19kg.
Equipment
Below is a list of the kit I took, and my thinking behind it.
Hiking:
Rucksack (2,250g)
I bought an Osprey Atmos AG 65 backpack. I went to a few shops and tried on different rucksacks, of different brands, and the Osprey AG ("Anti-Gravity") range were a stand-out favourite. The suspension of the weight, and distribution of the load was great. I'd read recommendations of rucksack size for this trek being around the 70 litre mark, but since the Atmos 65 (65 litres) was rated for 20kg of kit, which was all I could carry anyway, I thought I might as well be on the snug side. If nothing else, it would help me stick to that weight limit if there wasn't physically space for more. In hindsight, I'm really pleased with this choice of bag. It was just the right size, and it held up well, keeping the weight off my shoulders. Elliot went for it's big brother; Aether AG 70 litre, and was similarly impressed, so I would suggest this range if you're in the market for a trekking rucksack.
Pillow (100g)
A cheapo inflatable Quechua pillow from Decathalon. It was fine. I wanted something, as I wanted to be comfortable sleeping, and the inflatable ones were the only ones light enough and packable enough to take. 100g might not seem like much, but I gave serious consideration to everything I took, and I had to really justify the usefulness of a pillow in order to bring it. There are lighter models around, from better brands, but I already had this one, so I decided not to buy another.
Sleeping Bag (1,010g)
Rab Ascent 400. I splurged a bit on this one, as we weren't sure if we'd be camping when I bought it. So I went for warm, lightweight, down bag, with protection against damp. If you're staying in huts then you won't need one this warm. But it is a good idea to get a down bag, as it packs smaller. In my case, I hope it'll still be handy in the future, to justify the cost.
Sleeping bag liner (262g)
I got a very warm Reactor Thermolite Liner. Again, planning for camping. If you're in huts a lighter silk liner would be a better option.
Trekking poles (480g)
Most people suggest taking trekking poles, but I was really keen to avoid it, due to the weight. But I bought some, and in trial runs, they were hugely beneficial. In practice they made a real difference to my knees, and helped my back and posture when carrying the 20kg rucksack. What also helped get this into the packing list was the realisation that the weight didn't count towards my rucksack weight, as they wouldn't be in my rucksack while hiking. I bought a pair of Cnoc Outdoors Vertex Carbon and Cork poles, as recommended by a friendly YouTuber called Darwin on the Trail. They're cheap and cheerful, but they did the job well, and they're very lightweight for the price. I recommend getting cork handles, which are much nicer on your hands than plastic/foam.
1.5L Camelbak (1,675g)
I drink a lot of water, and a Camelbak is really helpful while hiking. Water weighs around 1kg per litre, so this 1.5 litre pack was a real drain on my weight allowance, but an essential for me. For the long hiking day ("Day 1"), I also carried a 500ml bottle, to get me up to 2 litres. I doubt many people would carry that much water, but hydration is an issue for me, so I had to ensure I'd have enough water.
Spork (10g)
A design classic, and Swedish cultural icon.
Penknife (100g)
Because you never know when you'll need to hack off your leg to get out of a situation.
Hiking Boots
I debated between my 1056g hiking boots and my 800g trainers, both of which are GoreTex. In the end the higher ankles won out, and that was the right decision I think. If the weather had been better, trainers (proper hiking trainers) would have been fine, but we were trekking through snow, slush, and puddles, so an extra inch in height was reassuring.
Photography:
Tripod Legs (1150g)
I have a Manfrotto 190CXPRO3. It's my normal everyday tripod. It's carbon fibre and I couldn't find something lighter that was stable enough, without spending a lot of money. Once you're in the £200 to save 200g territory, it's just not worth it. So I decided to get a lightweight head, and stick with the legs I already had.
Tripod Head (+ centre column) (382g)
I used a Three Legged Thing ('Corey') tripod head, which was very strong for the weight, and will be my tripod head of choice for future hikes & treks.
"Internal Camera Unit" aka "ICU" (390g)
I needed a case for my photography equipment, that would fit in the bottom ('sleeping bag') section of my rucksack. Keeping the camera kit there would mean it was easily accessible, and also close to my hips - a good way to load the heaviest item in the rucksack. I already had a cheapo ebay ICU, and that did just fine. You can get better quality ones from the likes of Tenba Tools.
Nikon D810+battery (1050g)
My camera. Must remember to pack that. I decided not to bring a spare camera body. This would be a gamble for some, but I didn't feel that I had the space or the weight.
Nikon 24-70mm f/2.8 (1030g)
This was a tough decision. The dream would be to take one lens, in the region of 24-300mm, that's sharp and lightweight. Even f/5.6 aperture would be fine to save weight, if it was sharp. But such a lens doesn't exist. So I think 2 lenses are required for a trip like this. This was my wide-angle option, and there are equivalent lenses at half the weight, and less. A couple of well chosen primes would have been around 250-300g. But I decided I'd rather put the effort in to carry this lens, in order to get the sharpness and zoom range it offers. I think that was the right decision for me, but it might well not for you. There are a lot of considerations that go into lens choice, and I spend months deliberating wide angle options.
Sigma Contemporary 100-400mm f/5-6.3 (1150g)
I was initially going to take my Nikon 70-200mm f/2.8, plus my 1.7x teleconverter. But The reviews for this Sigma were good, and it seemed sharp. The zoom range was perfect, so that's what temped me. It's not light for a multi-day trek - but it's lighter than the nikon 70-200 + teleconverter, and it would mean less swapping required plus extra reach. I decided to go with it, and I'm really pleased I did. The Sigma lens is indeed very sharp, and I'm now debating whether to keep the Nikon 70-200, since I've chosen the Sigma over it in every decision since I bought it.
Spare batteries (5) (440g)
There's nowhere to charge batteries along the way, besides solar or USB charging units you want to carry. The lightest option is to carry charged spares, so that's what I did. I took 6 batteries in total. I only used 3, but I would definitely take 5-6 if I did it again, just in case. If the weather had been better, I could easily have used 4 or 5, and I'd rather carry extra batteries than risk running out.
Filters, remote release, memory cards (470g)
A circular polariser (used a couple of times), two ND filters, an ND grad (which I didn't use, and never use), memory cards, lens wipes, remote release, etc.
Toiletries:
Total 290g
Lip balm
Another essential for me. Hot, cold, windy, wet, dry; all conditions associated with Iceland, and all leave me with chapped lips.
Sunglasses
I was loathed to make space for these, but I did it at the last minute. Only wore them once, but I guess if the sun had come out, I'd have regretted not having them with me.
Sun cream
Same as sunglasses.
Plasters
Ear plugs
Totally recommended for sleeping in the huts, or camping. My god there are some snorers.
Eye covers
I can't sleep without them if there's any light. So essential for me - both during the night (the sun isn't down for long) and for resting during the daytime.
Towel (118g)
Sea to Summit Pocket Towel (L). Good size, lightweight, packs very small.
Clothes:
8L dry sack (10g)
This was to contain all my clothes, within my rucksack.
Merino underwear x2 (156g)
One for sleeping, one for hiking. Yes that's grim, but needs must. And having wool helps a lot - both for hygiene, smell, warmth, and comfort.
Wool socks x2 (192g)
Same as above.
Merino base layer top x2 (320g)
Same as above.
Merino base layer legs (144g)
The only thing I took which I didn't use! Probably worth having, in case of very cold weather.
'Waffle'-type thin long-sleeve fleecy mid-layer (206g)
Warm Fleece with neck and head (316g)
I heartily recommend the 66 North 'Vik' hooded fleece sweater. It's warm, light, and versatile.
Travel In
Yes, an extra set of clothes to those above which were packed:
Thin socks
Merino underwear
Zip-off trousers
This was a gamble. I only took one pair of trousers, which doubled up as shorts (the zip-off variety). Not an especially trendy look, but in keeping with the environment. They were very lightweight (around 160g), and I'd have been in trouble if they'd have torn or something, but the gamble paid off, and I saved precious grams by sticking to this limitation.
Wool jumper
Would love an Icelandic one, but Swedish made a very good alternative. This trip really made me fall in love with wool. It's just amazing. It's light, warm, comfortable, comforting, packs down small, and resists smell over days of use. I genuinely love wool now
Merino tee-shirt
River-crossing shoes (425g)
I probably spent more time researching footwear for crossing rivers than anything else. Essentially, you can't cross barefoot in case of injury (sharp rocks, or something), so you need some footwear. That means carrying footwear the entire trek, to wear for a total of around 10 minutes, through a few rivers. It's mighty annoying. I explored all kinds of options, from Crocs (a popular choice) to tough socks (eg 'Skinners'), or Vibram Five Fingers. I dare say I could have found something lighter and/or cheaper, but I ended up going for the North Face Litewave Flow trainers. They were pretty light, and they were comfortable, and I needed to get some that I'd use another time too. I wasn't going to buy something that would only be of use for this trip. So I was happy enough with the choice, but I still resent having to carry them all that way for the limited time they were required.
Waterproofs etc:
66 North jacket (268g)
Must be fully waterproof! I have a 66 North Skalafell jacket which I trust, and it's very lightweight too.
Waterproof legs (344g)
It will rain in Iceland. You really need proper waterproofs.
Hat (72g)
I took a warm wool hat, and also a lighter merino hat too. If you have the luxury of a head of hair, then you won't need the latter.
Snood (44g)
Got to keep that neck warm.
Wool gloves (48g)
Bought some on a previous visit to Reykjavik. These were great. Those crafty Icelanders know their wool.
Waterproof gloves (114g)
These were a waste of time. I have a pair of Trekmates GoreTex gloves, but they're just not waterproof over several hours. I generally wore the wool gloves, even in heavy rain. They're warmer and feel better.
Accessories:
Passport (36g)
Phone (132g)
I debated leaving my phone at home, as the battery was never going to last the week without charging, but I decided to take it, to use on the buses (which have USB charging sockets, and wi-fi).
Phone USB charging cable
Head Torch (86g)
I resented having to take this, when Iceland has so few hours of darkness, it was never likely to be needed. But I was assured it was wise to take it, so I did. And I never used it.
Cash (50g)
I heard that although the huts take card payments (for food, showers, etc), that's only if the card readers have power and signal, so it's a good idea to take cash as a backup. I think I only took about £50.
Bank cards (10g)
ipod shuffle (26g)
The battery lasts ages on this, so it was great to have for the long buses, as well as down time, resting in the huts. Outside of 'quiet time' (10pm-8am), people are constantly cooking, packing, unpacking, chatting. So if you want a quick rest - which we regularly did between hiking and photography time - it's good to have some music to play over the background chatter.
map book
I took a book with me, which included a map of the route, and some text about each section of the hike. Although I'd read it a couple of times at home, it was handy to re-read each evening, to refresh my mind with what was in store for the following day.
Spare water bottle x 2
As mentioned before, I drink a lot of water. I carried a lightweight water bottle for when we were around the huts, and a versatile collapsible bottle to add more options to the Camelbak listed above.
Printed itinerary, Boarding passes, Bus booking info.
Bus tickets were paper print outs, so we needed those with us. I couldn't rely on my phone battery, so I printed my boarding pass for the flights too. Also had a printed copy of our daily itinerary, so I could refer to notes, and double-check hut bookings, etc.
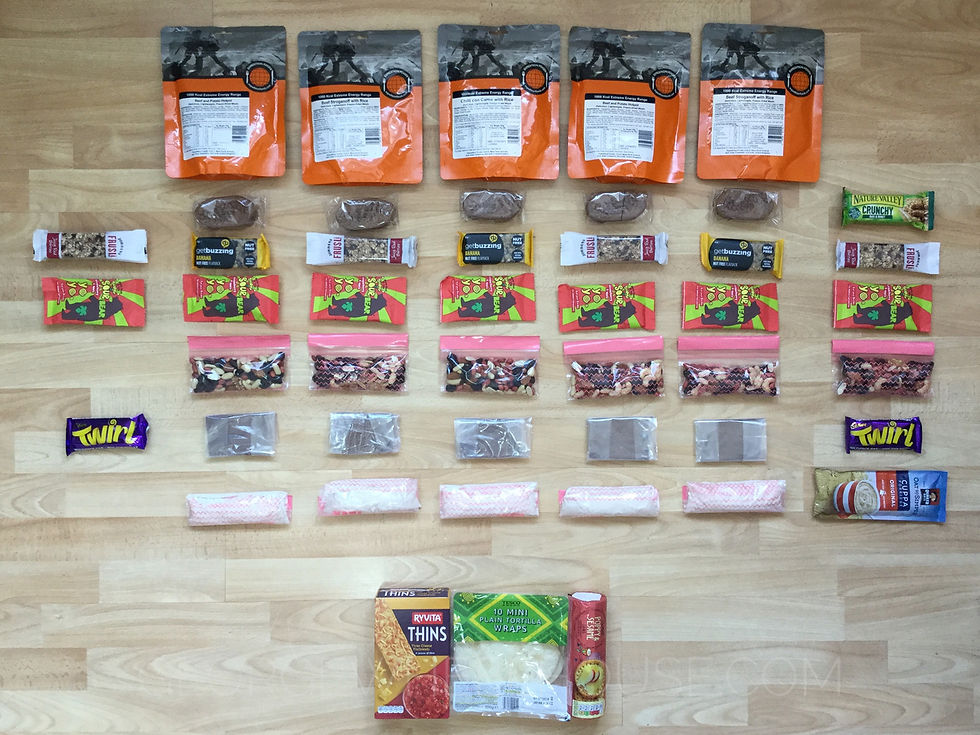
Food:
They say that your food will weigh approx 1kg for each day. I would have struggled to carry that, so again I had to consider every gram, and save as much weight where I could. I ended up with a total food weight of 4kg, for 5 days. I was also targeting a total of 3000kcal per day, but after a couple of days, it was clear that I'd have been fine (better off) with more like 2000-2500kcal per day. I ended up giving food away along the route, as I wasn't able to eat my daily ration, and didn't want to carry what I wasn't eating. Anyway, the following is a list of what I had for each day, which totals 3000kcal:
Porridge
An easy breakfast. Got some of those little 'just add water' sachets.
Belvita
Something sweet to have after my porridge, but not too sugary.
2 Tortillas.
Versatile and lightweight. Also no risk of going mouldy in the course of the week, which bread / pitta can do.
Tuna
Filling for the tortillas. I didn't bring enough tuna for every day, but I wish I had.
Poppyseed thin x 3
Some thin things with poppy seeds on them. An attempt to snack on something savoury, rather than sugar. I didn't like them, but that's because I like sugary things. They did their job, but I didn't eat them all.
Rivita Thins x 2
Another savoury snack, to have with lunch. Again, not really my thing, but they did a job.
Flapjack
An easy no-brainer snack.
Nut mix (85g)
Mixed fruit and nuts. Ticks a lot of boxes, and can be snacked upon while hiking.
Salt and pepper cashews
I'd read a few reports of craving salt by the end of a week like this, so I took something overtly salty to have along the way. These were really delicious, and I'd recommend them.
Bear YoYo
This was my wife's stroke of genius. She noted that we've seen our nieces and nephews with these fruit snacks, so I had a look at them. They're tiny, lightweight, sweet, and one of your five-a-day. So ideal for a trip like this.
Elk snack
Ikea do these elk sausages which don't need to be kept refrigerated. They wouldn't be my first choice - very strong smokey flavour, but they did the job.
Snack cheese x 2
I bought little individual 20g packets of cheese, and they were another success. You need fat on these hikes, and cheese is a great way to get it. They went in my tortilla wraps and in my dehydrated meals.
Expedition Foods dehydrated meal
My evening meal. Elliot found these, and they proved a great buy. As a calories-to-weight ratio, they're a real winner. They come in packs of 450kcal, 800kcal, and 1000kcal. I bought the 1000kcal meals, but when it came to eating them, it was clear that 800kcal would have been ample.
Herbs, salt, pepper, and chilli flakes
What a tip to pack these. And one I ignored. Had to borrow from Elliot, and they made all the difference to the dehydrated meals.
Chocolate 60g
After the scenery, this was the highlight of my day. I took a 300g bar of my favourite Lindt chocolate, and divided it into 60g over 5 days. I had to split it before I left, otherwise I knew I'd have eaten it all by day 2.
Landmannalaugar & Getting There
We landed at Keflavik Airport early in the morning, and took the Flybus transfer from the airport to Reykjavik central bus station ("BSI"). The BSI is just (10mins walk) outside Reykjavik city centre, and it's where our bus to Landmannalaugar left from too. We booked the last bus of the day (1pm) to go to Landmannalaugar, so that we'd have 2-3 hours in Reykjavik between buses, to walk into town, pick up any supplies, and eat our last hearty meal for 5 days. The main thing people buy in this downtime is camping gas. If you're staying in huts every night, then you won't need camping gas. But if you are camping, you'll need gas for your stove, and you can find it at the petrol station 100m from the BSI. Note you can't take it on the plane, so you have to buy it locally. If you're in a rush, there's fast food at the petrol station (the hot dogs are good), or there's a decent looking canteen at the bus station itself (featuring boiled sheep's head, for the full tourist treatment). But we had plenty of time, so we walked up to the iconic Hallgrímskirkja church, and ate in the little Cafe Loki. This was a tip-off from a local, and if I had my time again, I'd do exactly the same. Gratinated Mashed Fish (Plokkfiskur) with homemade rye bread went down a treat. So much so that I've learned to make it myself since getting home (oh, spoiler alert: we did survive this trip).
We got back to the BSI in plenty of time, and I had a nervous half an hour waiting for the bus, anxious about the days to come, and whether I would cope with the demands. To complicate things further, a storm was forecast the following day, and the Icelandic Search and Rescue (SafeTravel.is) were advising (strongly) against starting the Laugavegur trek that day. Fortunately we'd scheduled to spend that day in Landmannalaugar rather than starting the trail right away. But the storm would write off our plans for hikes and photos that day, and we also had to hope that it passed through enough that we could safely start out on the trek the following day, which was 50/50 at this point. Despite travelling with my experienced dad and brother, Elliot and I were fairly adamant that we would stick to the advice of SafeTravel.is, and only hike the trail if they deemed it safe. So waiting for the bus on a sunny afternoon in Reykjavik, I was pensive about the upcoming 48 hours, and what it would hold for us. Having booked our huts, we had no flexibility on dates, and would have to abandon the trek if the storm didn't pass. Anyway, the bus arrived, and off we set.
The buses are generally very reliable, but unfortunately our bus broke down with around 20km to go. When maneuvering to let another bus pass along a one-track road, in the middle of nowhere, our bus reversed over a road sign and burst a gas pipe. Having lost phone signal, we couldn't call for a replacement bus, which would have been 4 hours away anyway. After stopping to try and repair it, the driver ploughed on at what must have been around walking pace for the rest of the journey. The bus had lost it's suspension, and anyone who's taken this dirt road before will know that it's full of potholes, rocks, drops, and ramps. It was killing me to see the beautiful light on the mountains around us, knowing that this evening was our only chance to get some photos in Landmannalaugar before the storm hit. We eventually crawled into Landmannalaugar at nearly 9pm (scheduled arrival time was 5:15pm). We'd pretty much lost the light by this point, and no longer had time to go up Blahnuker ('Blue Peak') as planned. We rushed out to try and salvage something of the evening, but the rain started, and I got nothing except wet. The storm was coming in, so we went back to the hut.
Oh god, the hut. I feel sick thinking about it. I'm a quiet, polite, anxious, middle-class boy, with a clearly defined sense of personal space. The hut was the antithesis of my idea of holiday accommodation. Our bedroom can best be described as two beds, one on each side of the room, with 9 people in each bed; side-by-side. And because of our bus delay, we were the last ones to arrive. So people had to shuffle up, to make space for us in the middle. It was by far and away the worst aspect of the trip, and Landmannalaugar was the worst of the huts. In fact I can only think of one thing worse than that Landmannalaugar hut, and that would be camping. In spite of everything, at least the hut was warm, and we were out of the storm. I didn't sleep much that night. I laid awake, thoughts racing, and in more doubt than ever that I had it in me to do this.
The following morning it seemed like the rain wasn't as heavy as forecast, so we nipped out while it wasn't too bad. We went up Sudurnamur, which offers a spectacular vantage point over Landmannalaugar and the surrounding area. We couldn't go all the way to the top due to the strong winds and low cloud, but we got high enough for some good views. Below, this handsome man withstands the gale force winds to shoot with that beautiful Sigma 100-400mm lens.
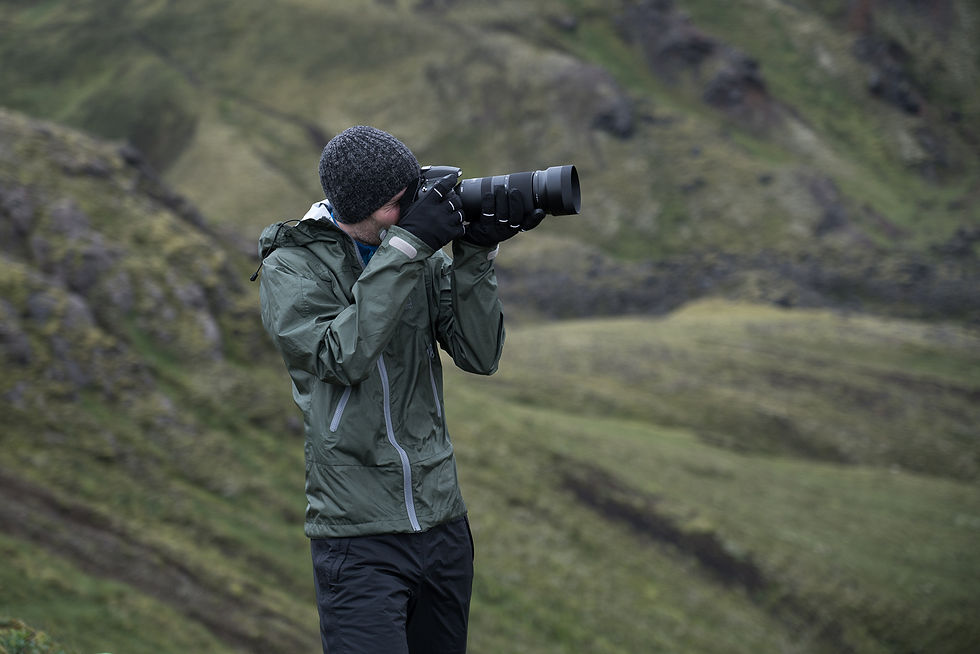
Because of the low cloud and rain, I only used the telephoto lens here. Even though the rain was light, the wide angle lens wouldn't have stayed dry. And the tops of the mountains were lost in the cloud, so I felt the best option was to pick out smaller scenes and abstracts from our vantage point.
After that we decided to try and get up Blahnuker, as it would be our final chance to do so. I'd guess we got around a quarter of the way up before the wind became so strong it was difficult to stay on our feet. The rain had intensified, and it was clearly well beyond the point at which I could get my camera out of my bag. So we had to abandon that, and confine ourselves to the hut for the rest of the day. It was a long afternoon and night. All the time crossing our fingers that the storm would pass, and we'd be able to start the trail the following day. I slept a little better the second night though.
I didn't get any great photos in Landmannalaugar. I shared a few in the previous post, but they're nothing compared to what we could have got if the weather hadn't been so restrictive. It's frustrating, but that's Iceland. It can be spectacular, but you have to respect the forces that make this island so unique in the first place.
Day One: Landmannalaugar -> Álftavatn
We had a long walk ahead of us, and the morning suffered the tail end of the storm from the previous day. So we took our time with breakfast, and didn't rush off, figuring the later we leave the better the weather would be. This was true, but obviously we couldn't leave it too late as we didn't want to be rushing. We had ideas about sunset photos that night, so wanted to get to Álftavatn by late afternoon. So we left around 10ish I think, in the drizzle.
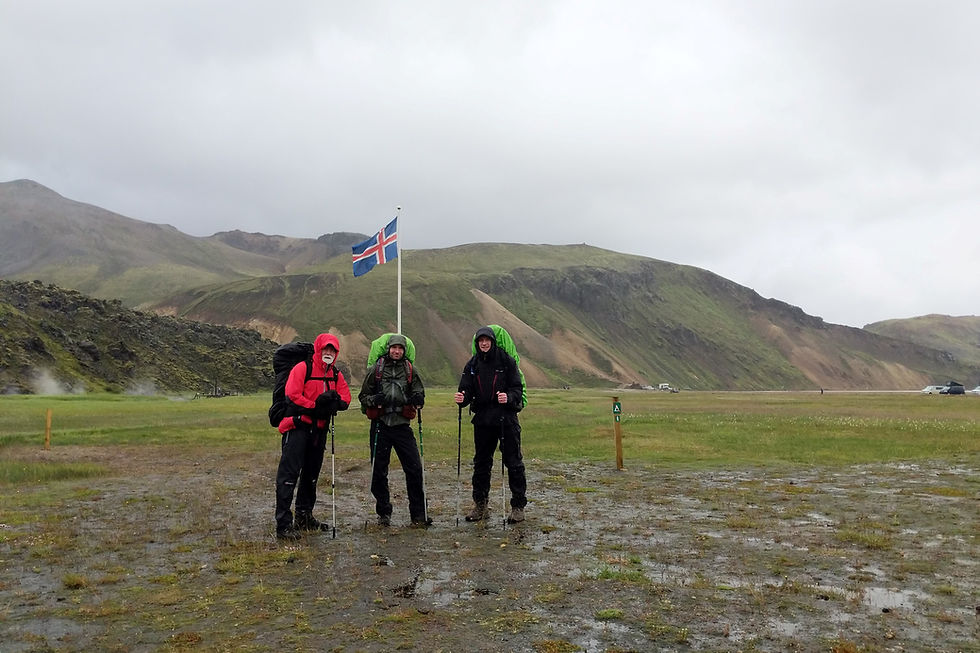
We stopped at the other end of the lava field (left of the photo above), to take photos of the meadow and the mountains behind, but were confounded by rain and low cloud. I was questioning the point of it all, but also relishing the challenge of the hike in spite of the difficulties. And I knew that the further we got from Landmannalaugar, the better the weather would be. That morning, we passed some of the most unique geology and scenery I've ever witnessed. All the time in gale force winds and rain or hail. It was gutting not to be able to take photos. In the past this missed opportunity would have crushed me, but I'm working to change that mindset, and I was prepared for that sort of disappointment on this trip. I think I took it well, and I enjoyed the views and the experience, photos or not. Those views will live with me, despite having no photos to share of them.
So we pressed on, up, and up, and up some more, to the snowfields of Hrafntinnusker.
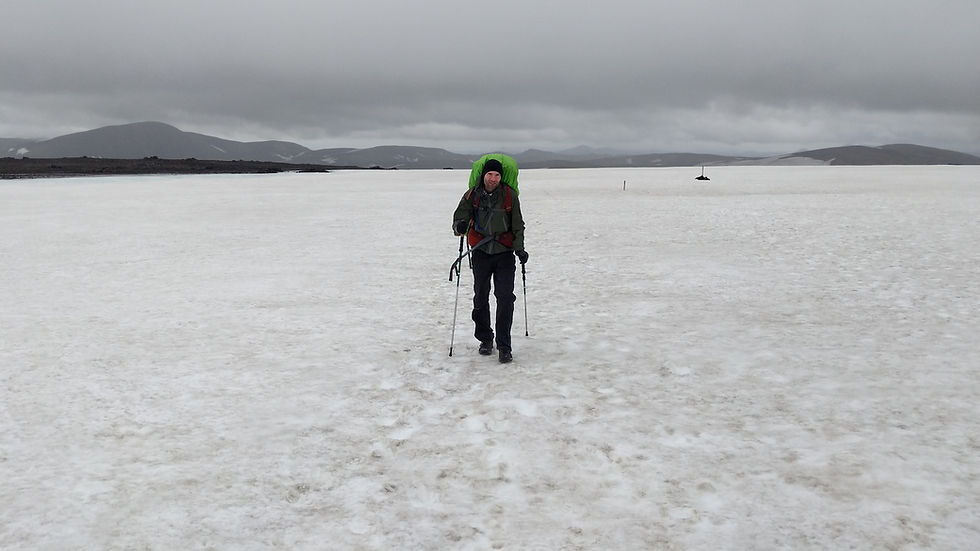
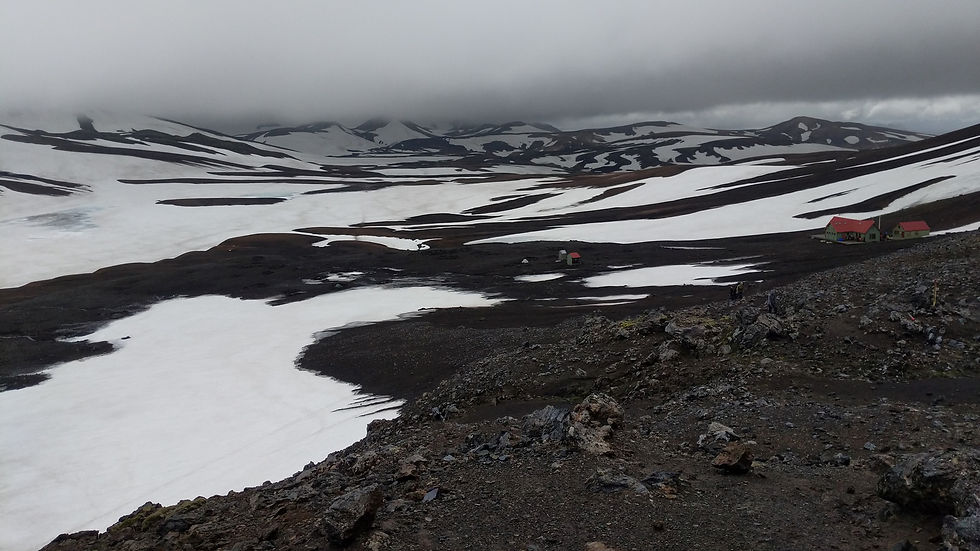
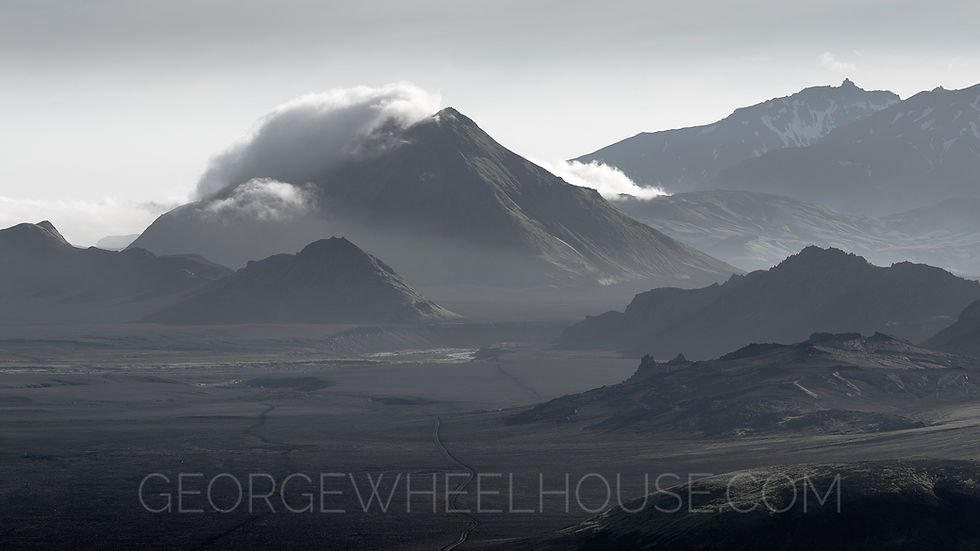
Until we reached the Hrafntinnusker hut, which was our lunchtime stop, and the high-point (altitude, not morale) of the trek. You can see from the photo below, what sort of scope this place offers for abstract photos, as well as mountain and adventure photography. But it's pretty hard to do much when the cloud covers all the peaks, and you can't keep the lens dry from the rain. I wouldn't have wanted to stay the night in this hut. It's regarded as the most basic of all the huts along the way (yes, worse than Landmannalaugar) and things can get pretty bleak up there.
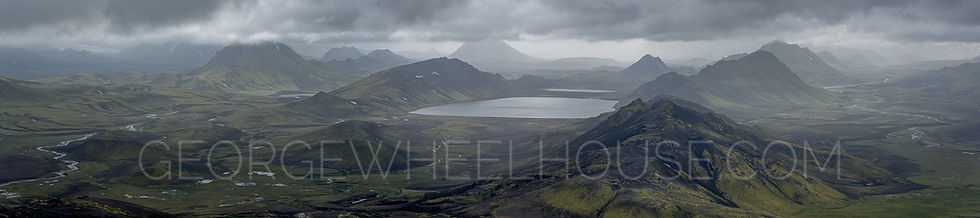
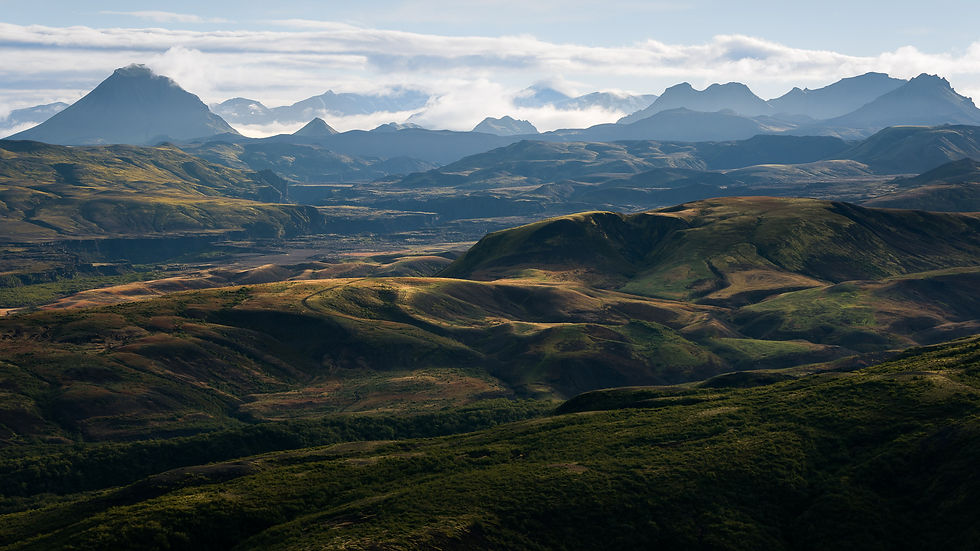
From that halfway point of the day, we carried on through more active geothermal areas, until we reached Jokultungur (Glacier Tongue), a lookout over the green Álftavatn valley. This was probably my favourite viewpoint of the entire trek. There's such a wide view, and so many shots and angles available. Yet, still the tops of the mountains were clipped by the low cloud, rendering these wider shots useless in my opinion. Below is a panorama image of the valley in front of us at this point, with Lake Álftavatn in the centre, and the hut just about visible in front of it.
There weren't many decisions we made along the way which I regret in hindsight, but moving on from here was one of them. We reasoned that after 10-20 minutes the cloud wasn't lifting, and we had a long way still to walk. So we ought to get on and get to the hut in good time, to give us time for a rest and something to eat before a sunset shoot. In reality we got to the hut, had a shower, and didn't want to go out again, after a long tiring day. We should have scrapped our sunset plans earlier, and stayed at Jokultungur for a couple of hours, watching the cloud and light change (which it did later on). We missed a great opportunity here, and one I'd take if I were to have my time over. We were still a couple of hours walk from the hut, but really we could have stayed quite a while longer than we did.
Other opportunities missed this day include Storihver (a very active geothermal area), Söðull (a cliff accessible via a side-hike shortly before Hrafntinnusker, offering fantastic views when visibility is good), and the former ice caves of Hrafntinnusker. All were axed due to the weather, which was the right decision on the day, but a shame nonetheless.
Just before the home straight to the hut, we had our first river crossing; Grashagakvisl. This was fine. Fun, if I'm honest. We were close to the snow-covered mountains where the water was coming from, so it was clearly going to be very cold. The real annoyance of the river crossings was the time they take, changing footwear, carrying boots & socks, rolling up or zipping off trousers, and then drying and dressing on the other side. I think the water was over knee height here. And the cold hits you like needles around 10 seconds in :-)
The Álftavatn hut was the dampest of the huts we stayed in, since everyone was trying to dry wet clothing from that day. It was humid and cramped. But instead of the Landmannalaugar-style people-smuggler's approach to bedding, we had bunks here. I mean I say 'bunks' as there were multiple beds, but not one bed per person. Obviously not. It was two to a bed, so Elliot and I shared a top bunk mattress somewhere between the size of a single and a small double. I wouldn't say it was romantic, but it was cosy. And at least I only had someone else on one side of me, not both.
Day Two: Álftavatn -> Hvanngil
The pressure was off today. With only 5km to walk to the next hut we pretty much had the day to do as we wished. We took a walk west, into the next valley on, which was very scenic, but I couldn't really find an interesting photo. There are a few interesting options from Álftavatn, including Bratthals, and Torfahlaup Gorge, so I'm not sure we made the right call. But it was nice to wander off somewhere on our own, without a recognised scene or goal in mind.
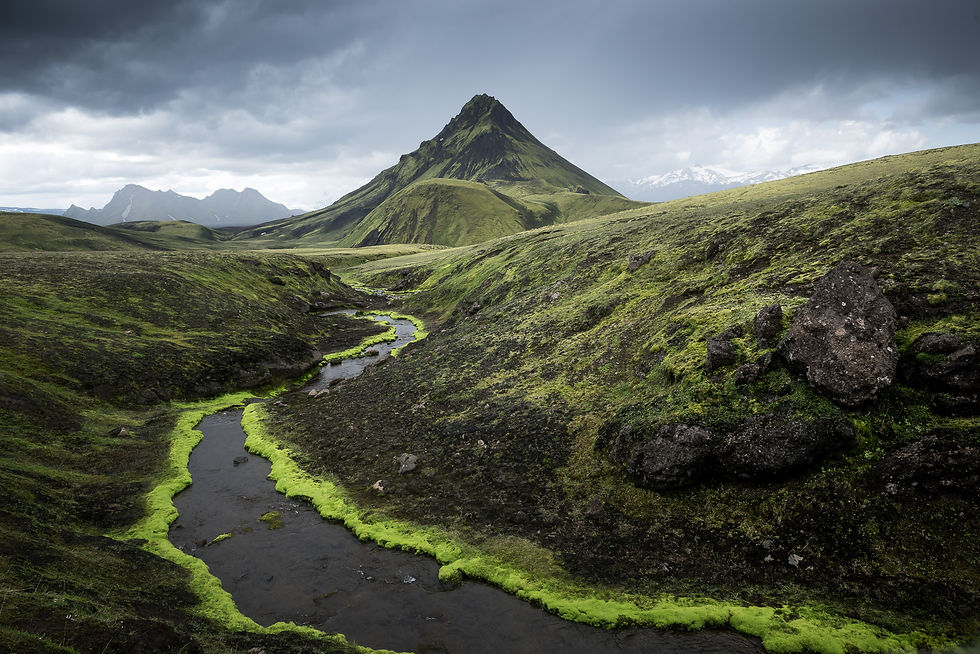
We got back to the Álftavatn hut for lunch, planning to make use of the picnic tables there. Just as I opened my food bag, it began to rain. Thirty seconds later it was hailing. So lunch was off, and we decided to make a move and head down the trail to Hvanngil. There was a small river crossing here; Bratthalskvisl. This one was fairly shallow, and not that wide either. Just a nuisance really. Soon after that, we found this stream with it's amazing bright green moss. We stopped to take a few photos initially, then followed it around the corner to find this composition featuring the captivating Stórasúla volcano in the background. Stórasúla is such a stunning feature of this area, it was pulling my attention the whole time. The size, shape, and blend of black & green combine to make it a photographer's dream. I could have spent all day finding different angles and views of it.
Shortly after this, we got to the hut at Hvanngil, which sits underneath Stórasúla. Hvanngil might have been my favourite hut. The location is amazing, with spectacular views all around it. And it was a nice size; the smallest so far. Best of all, it was under-booked. I guess the majority of people stay at Álftavatn instead. So we had spare beds in our room, and Elliot and I spread out to a bed each. What a luxury! The beds here were bunks again (intended to share 2 people to each mattress). I think everyone in our room had a bed to themselves that night, which was nice, and it meant that the room didn't feel crowded either. I was starting to think I could do this after all.
We had a rest and a meal at the hut, then set out for our sunset shoot. And for once the weather was on our side. It looked as though we'd get some sun. We hiked up Hvanngilshausar, which is a short, steep climb, rewarding you with a fantastic view of the valley.
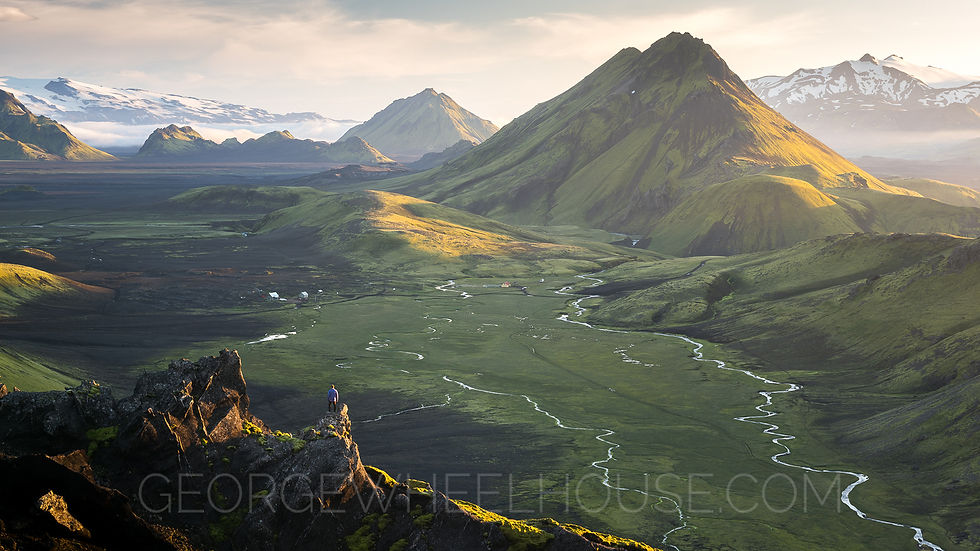
Of note in the photo above;
My brother posing very well, but too far away. I should have tried out this composition sooner, and worked out that the wide angle lens would leave him this small in the frame. What can I say? I this is not my usual style of photography.
The streams in the foreground look great. I was fearful that once the valley was in shade from the ridge to the right (as the sun goes down), we'd lose the light on the streams. But Elliot pointed out that they would reflect the light from the still light sky, and it's true. One of those things which comes out better in a photo than it looks with the naked eye at the time.
There's a small cluster of grey buildings, small in the middle-distance. They're the Hvanngil huts.
Looking beyond the huts you can see the large black desert of ash which we'd be crossing tomorrow. It might not look like much now, but there's several miles of trail in this shot alone, with more out of sight beyond.
Beautiful Stórasúla, side-lit, and rising high in the middle-distance (right).
To the left of is Stórasúla is Hattafell, the next pointy volcano to dominate a section of the trail. More on him to come.
In the far distance is the infamous Eyjafjallajökull ice cap.
Between Hattafell and Eyjafjallajökull is a patch of mist, covering Emstrur (our destination for the following day) and Thórsmörk valley (our destination for day four). This area also clouded up the following evening, scuppering our chances of any views/scenery.
Day Three: Hvanngil -> Emstrur
I found this section of the hike a little dull compared to the constantly changing scenery of the previous couple of days. This 11km hike lead us across the black desert of volcanic ash we'd seen from Hvanngilshausar the previous night.
Only a few minutes after setting off on the trail, we reach Blafjallakvisl river, which we have to cross. This was a fairly wide river, and the advice is to look a hundred metres or so up river, for a crossing point which takes in a small island halfway across. This was the coldest river we crossed. Maybe because of the time of day we crossed it, and the time spent in the water, but it really was like an ice bath. Once across you can sit and dry your feet, feeling refreshed, and watch everyone else struggle through the cold! After that, it's a long slog across the ash desert.
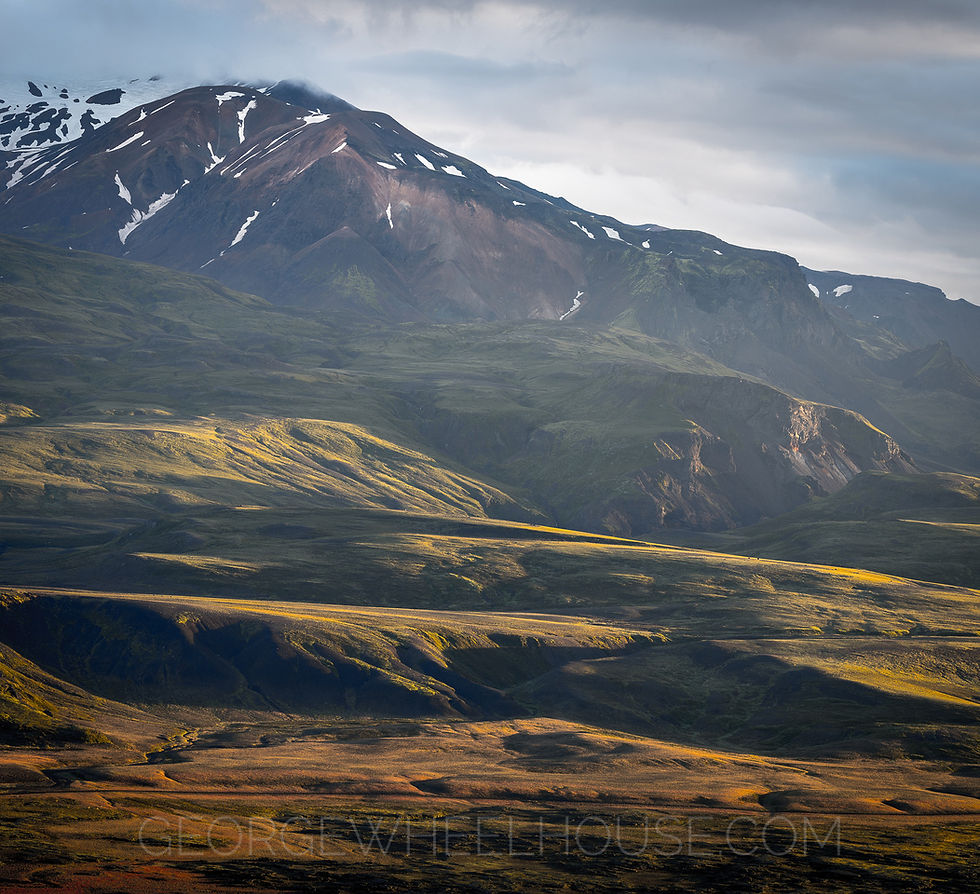
The photo above shows the hiking trail (left) and an access road (right), the mighty Innri-Emstrura river, which we cross by bridge, and Hattafell looming large behind.
To the left of the view above (out-of-shot here) is the captivating Storkonufell, which looks fantastic from every angle. It was covered by low cloud as we walked past, but it has real potential for great photos, and the flowers surrounding the trail can make a great foreground too. I got one photo of Storkonufell which featured in the previous post. Had the weather been better, we'd have had many more opportunities too, including from the hill which overlooks Emstrur.
There are lots of great photo locations in this area, particularly if you want to hike up some of the fells surrounding the trail route. But we stuck to the trail, and hoped for success at the Emstrur end. Unfortunately for us the cloud came in early, and we weren't able to make the most of the area.
The huts at Emstrur are called Botnar, and they're pretty nice, but they felt busy after Hvanngil. They're spread across three smaller buildings, rather than one large one. Bunk beds again, and it was cramped, but by this point we were starting to acclimatise to the conditions.
Nearby to Emstrur there is a large, deep canyon called Markarfljótsgljúfur, through which the Markarfljót river flows. Maybe it was just he dull light we had, but I didn't find anything photogenic about the canyon. If you have the time spare, it's worth a look, but don't prioritise it for photography.
Day Four: Emstrur -> Thórsmörk
This hike offered interesting views in the first and last quarters, but dragged in between. It also felt like there were more people around than the previous days. On day one, we walked on for further than most. On day two, we had hardly any distance to walk, and spent our time doing our own thing. On day three we had a head start on most people (who were doing that stretch from Álftavatn). So it was notable to be back amongst other hikers for the final stretch.
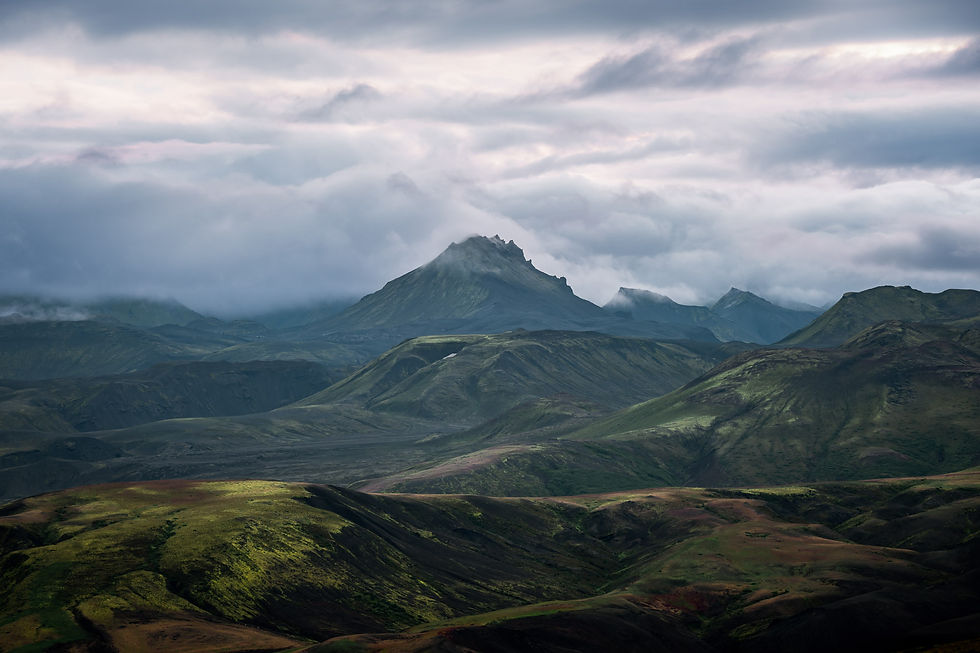
The photo below shows the terrain of this day, albeit from Thórsmörk, looking back to Emstrur, with Hattafell in the distance.
The main feature of the hike on this day is the river crossing at the edge of Thórsmörk. The Thronga river (Þronga) flows down a fairly wide plain, splitting into several streams which vary in depth, width, and flow. Take your time to choose a route. Generally the wider streams are more shallow. Try to avoid the faster flowing streams. I think we had to cross about three individual streams to get to the other side, each seemingly wider and colder than the last. But it was fun.
Soon (20 mins?) after crossing Thronga, we got to our hut in Thórsmörk; Langidalur. I'm in this photo somewhere.

The Langidalur hut was relatively large. Probably the largest we stayed in. The sprawling dormitory comprised all sorts of different types of beds, and by getting there earlier than most, we hit the jackpot; single bunk beds! The relative luxury of our own individual bed to sleep in. Imagine that. We found a small 'cabin' off the main throughway of the dorm, with bunks either side, a bit like you might imagine in a sleeper train carriage. Had the Hvanngil hut been as full as all the others, this would have have been our best night's accommodation. But the space in Hvanngil during our stay made that night more pleasant.
Thórsmörk
From Langidalur you have a few options, each offering spectacular views, according to how much time you have. The hut is right next to Valahnúkur fell, which is a steep 15-20 minute climb, but rewards with fabulous views in all 360 degrees. If you have longer, then alternative options include the Tindfjoll Circuit (11km, 5-6 hours), or Goltur (long hike, 10-12 hours). Both offer some fantastic viewpoints of the main Thórsmörk valley.
We arrived in Thórsmörk for mid-late afternoon, so we had time to unpack our things at the hut, have something to eat, and nip up Valahnúkur for sunset.
The following day, we had to catch the bus back to Reykjavik, but we decided to get up for our only sunrise shoot of the trip, and make the most of our to easy access to Valahnúkur. So we set our alarms for 3:45am, and struggled up the fell one last time. Sunrise wasn't amazing, but I got a few nice shots despite that. This is me looking vaguely south at sunrise on Valahnúkur.

Given the direction of the light, I'd say sunset probably has a little more potential of dramatic photos at this spot, but given the proximity of the fell to the hut, it's about as convenient as it could be for sunrise, without staying on the fell itself.
I took a few of these wide-aspect horizon photos from Valahnúkur. A couple of them are in the previous post, but here's another. I like wide landscape photos, and I also found Hattafell pretty enchanting, even from this distance.
Looking north, the mountains were all kinds of colours...
My knees made it down the fell, and we had our breakfast in what can only be described as relaxing surroundings. This hut was really nice, and I think everyone else there seemed very happy too - presumably buoyed their successful trek. The busses to/from Thorsmork stop at each of the three huts, and there are several each day. The bus journey is another final adventure, crossing deep, fast-flowing rivers on the way back down to the south coast, and the familiarity of the Ring Road. We had one night in Reykjavik, before the flight home the next morning.
Appendix I: Huts & Campsites
Each hut along the route is comprised of an office, a dormitory-style sleeping block, shower/toilet blocks, and an area for camping. The huts are operated by Ferðafélag Íslands (FI.is). They're not cheap (~£60pp for hut, ~£12pp for camping), but the alternative is wild camping, which I'm not ready for yet. The huts are all cramped and very basic, but they're clean and tidy. As an example Elliot's post has a photo of the bedroom in the Landmannalaugar hut.
The kitchens have gas hobs, pans, plates, cutlery, etc, so if you're in the huts you can use these. If you're camping you need to carry your own.
All the huts have flushing toilets except Hrafntinnusker (which is composting), and loo paper. And they're all separate blocks to the accommodation, about 20 metres apart, so not convenient for night time visits. Showers cost around £4 for 5 minutes, and you need to buy a ticket at the hut office to get them to work. This is money well spent in my opinion. I might be recycling clothes, but a shower at the end of each day was a welcome comfort, and helps those wool layers stay fresh for another wear.
There's a warden at each hut, who'll check you in, and will also have good advice about weather, or any other questions you have.
Although we booked early and still didn't get our huts without relying on the waiting list, you can book later and still secure huts every night. You just need to be flexible about dates. We met other people there who had booked their stay (with huts every night) just two or three months ahead; one solo traveller booked just a fortnight before the trip. So don't be too concerned about having to book early.
As I mentioned earlier, we decided to stay in huts in order to save the weight of tents/stoves/roll-mats. You'd have more personal space in a tent (which I would value), but the opportunity to dry clothes and kit, and stay warm is huge advantage of the huts.
Note, you can't wild camp inside the Fjallabak nature reserve, but the majority of the trail is outside of it.
There are a choice of three huts in Thórsmörk:
Langidalur - Which I'd recommend if you're finishing the hike at Thórsmörk.
Basar - Which I'd recommend if you're extending the trail via Fimmvörðuháls.
Volcano Huts - A private (not operated via FI.is) accommodation, which is a little less basic, and more comfortable. I'd stay here if I was visiting Thórsmörk, without hiking the Laugavegur.
There's a bar at Álftavatn. It's a nice spot for it, with a lovely view. As I recall, it was inexplicably hot in there (over 25°C). The men of the group had a beer, while I had a chocolate muffin.
Appendix II: Buses & Transport
There are three main bus companies running services to/from LandmannaLaugar and Thorsmork:
Reykjavik Excursions
Trex
Sterna Travel
We used Reykjavik Excursions, and we booked the Hikers Pass. We also booked FlyBus airport transfers via Reykjavik Excursions.
The buses to/from Landmannalaugar are comfortable enough. They're not cheap by any means, but that's Iceland for you. They have Wi-Fi and USB power sockets, though the Wi-Fi signal is lost around halfway to Landmannalaugar.
You'll want Route 11 from BSI to Landmannalaugar. There's a 20 minute coffee/toilet/supermarket break at Hella around halfway through the 4h15m journey. This is the last town before we head inland to the mountains.
Returning from Thorsmork, we took the 9A, changing to the 20A at Hvolsvollur halfway through. The changeovers are easy to manage, with nicely timed overlaps, so it's all pretty simple.
Appendix III: River Crossings
The river crossings regularly come up as one of the more daunting tribulations of this trek, and part of that is probably because it's hard to get a handle on what they'll be like before-hand. I've never waded through any river before, cold or not, but it turned out to be great fun. When all is said and done, it's things such as crossing near-freezing glacial melt-water streams which are the experiences you remember most fondly from these hikes. As I mentioned earlier in the kit list, you need some footwear to cross the rivers, and they need to be lightweight (like everything you take), with a reasonably sturdy sole, and proper fitted ankles (flip-flops will come off in the strong currents). The hiking poles were particularly useful on the crossings, to stay steady against the fast flowing water and uneven river beds. Take the time to choose a crossing point; looking for wider sections (which will be shallower than the narrower sections), and be mindful of the strong currents. In terms of depth, the water varied between shin height and thigh height, but generally under the knee. Get your shorts on, keep your towel accessible, and remember to enjoy it :-)

Appendix IV: Preparation
You don't have to be super fit to do this hike. I'd say it's pretty accessible to most people in average shape. You can go at your own pace, and carry as much or as little as you like, and there was a good mix of people on the trail - not just your typical hikers.
Even so, I wanted to make sure I was physically able to handle what I was taking on, and that I wouldn't be let down by tired limbs and lack of energy to see and do all the things I wanted to. My fear was that we'd be so tired by the hiking and the heavy packs that we would lack the enthusiasm to go out again for evening shoots, pre-hike shoots, or side-hikes. For several months ahead of the trip, I was out running regularly to get fit. I had physio for a knee injury in the spring, so got some good leg exercises from that.
What concerned me most was the weight of the rucksack, as that was something I'd never done before. Having a good rucksack helped, but both Elliot and I wanted to have some practice carrying the weight, and also with camping (as our hut places weren't secured until relatively late on). So we have two weekend trials; one in Snowdonia, camping and scrambling up Crib Goch with 10kg rucksacks, and one camping and hiking a 12 mile trail with 20kg rucksacks in the Peak District. I bought my hiking poles in between those trips, and they proved themselves hugely beneficial when carrying the full-weight rucksack. For two inexperienced hikers the opportunity to experiment with kit like that, and get an understanding of the efforts involved in hiking the trail were hugely valuable. Most importantly, hiking 12 miles with 20kg each, and feeling fine afterwards gave us both the confidence that we could not only hike the Laugavegur, but enjoy it too.
If you're in the same position I was in this time last year, and these numbers are all pretty meaningless, just have a go; do a trial run and see how you get on. It'll either settle your mind or focus it on what you need to do to get yourself ready to enjoy your adventure.
Appendix V: Managing Expectation
Our preparation and planning was all about giving ourselves the best opportunity for photography possible. But I was determined not to let it ruin the experience should any opportunity not work out as imagined. We were going for photography, but equally for a photography experience, and an adventure. So despite the goal being good photos, I was very mindful of the need to deal with setbacks and bad weather - which I've found very frustrating in the past.
I've written about the difficulties of managing expectation in nature photography before, and how it's something I tend to struggle with. This was the first time I'd gone on a planned multi-day trip knowing that good weather and light were unlikely, but that I could work with dark and moody weather - as to me, that's what Iceland is like. That was not only a new outlook for me (not being so reliant / concerned with the light), but also a weight off my mind. And that helped me enjoy the photography experience more than some previous trips. There are plenty of photos around of Iceland under blazing sunsets and whirling aurora, but those events are few and far between. I wouldn't mind seeing them of course, but I'm very happy to have captured what I consider a more realistic Iceland, and one that reflects my experience of the place.
Appendix VI: Hindsight
In hindsight, I'd recommend our schedule for time on the trail, but I'd swap a day in Landmannalaugar for an extra day in Thórsmörk. Thórsmörk is equally, if not more spectacular than Landmannalaugar, and the weather is considerably more reliable there. In fact I've now spent approximately 48 hours in Landmannalaugar, over a couple of different visits, experiencing storm conditions for around 45 of those hours. It's a beautiful, but brutal place. It's not easy to take photos with rain splattering into the front of the lens, not to mention the safety of going out in high winds.
The biggest thing I regret is rushing the first leg of the trek on the expectation of shooting in Álftavatn that evening. It would be better to take all day, stopping more along the way, and taking lots of photos of the otherworldly landscapes in that stretch. In our case the rain scuppered our chances of photography that morning, but if we had have written off the evening shoot (which we didn't do in the end anyway) from the start, we could have left later, and waited out the worst of the weather.
Ultimately, I think the best way to hike the Laugavegur trail is to be flexible. Go last minute if you can. Obviously you need to plan and prepare well ahead of that. But I think to maximise enjoyment and photo opportunities, you need good weather, and flexibility in plans. Any issues we had with scheduling were caused by our reliance on the pre-booked huts. Ideally, I'd suggest doing prep, making sure you have everything you need, and then keep an eye on the weather forecast as we get into July / August. Once it's clear you're going to get a good (dry) week, go for it last minute. Since I'm not Icelandic this would mean I having to get flights last minute too, which is an extra problem. As for accommodation along the way, I'd camp. If the weather is OK, camping would be more pleasant, more spacious (and when did you ever hear that about camping?), and more flexible. You'd be able to live to the sleeping hours that fit around photography, and to switch up your plans as you go along, rather than to stick to the hut bookings as we did. But - and this is a big but - that banks on having a reliable spell of good weather. If it's going to rain, camping becomes unpractical and unpleasant. If you need to book ahead of a reliable weather forecast, then you should assume and plan for rain at least 50% of the time - that means relying on huts, and working with the schedule structure they require.
Appendix VII: Experience & Summary
The experience was amazing, and I'm really glad we opted to hike the trail, rather than camp in one place, and day-hike from there. Despite it being actually much easier than I expected (feared), I have a real sense of achievement for having hiked the Laugavegur trail, and I wouldn't have that from most other photography trips. In terms of the photos I got from the trip, I can't say that they justify all the research, prep, hiking, and effort I put in. But nonetheless, I'm still very glad we did it, and I'd do it all again tomorrow. I love the culture and landscapes of Iceland, and you never know what you're going to get in terms of the weather conditions and the light. So coming out perhaps under-par in terms of photos on this occasion would in no way discourage me from doing the same, or similar again, with a realistic expectation to achieve better photos another time.
To our great surprise, we saw very few other photographers on the trail. We were very (pleasantly) surprised by this, as Iceland is so popular with photographers these days, but I guess they're all sticking to the Ring Road. I think I saw only other person carrying a tripod along the trail, and whenever we stopped for photos (even in the better known viewpoints), we had the place to ourselves. It made the hiking, hard work, and long days worth it to be able to be in these beautiful locations on our own. And it backs up the idea that you only have to put in some effort and you can easily get away from the crowds.
Uncharacteristically, I did enjoy meeting other hikers on the route. I think I found it particularly interesting because everyone was from all over the world. In fact, I don't think we met any other Brits on the route, which was nice as there are plenty of them at home, and I enjoy hearing viewpoints from other countries. It was nice to catch up each night; trading stories and experiences of the day.
If you're thinking of hiking the Laugavegur Trail, do it. If you're thinking of trying a combination of photography and trekking, then Laugavegur is ideal. You have just enough help available (huts, other hikers, good support and advice), yet you can very easily be out on your own looking at a view very few people have ever seen. I thoroughly enjoyed the experience, and I'd heartily recommend pushing yourself to the edge of your comfort zone, and further than you have before. You'll enjoy your photography, and treasure the experience.
OK that's it, you can go now.
-
George


Super helpful details as we look into what kind of photos we'll get on the trail this year! Thank you for documenting!
-
Jesse